Clipping wing feathers is something that is a personal preference and varies from poultry owner to poultry owner. If you have a particularly flighty bird and you’re worried about it flying off-property, this may be an option to consider. Some folks prefer not to clip feathers so that a bird can escape a predator like it could in nature. The unfortunate reality is that unclipped wings do not deter a hungry predator. Though it will give the bird a chance to escape, most birds rarely get that opportunity.
 For me, I do clip wings, but only as a last resort. I find that wing-clipping temporarily grounds the bird long enough to retrain them to the area of the property in which I prefer them to remain (and helps to keep them and their poo off my new roof). Their flight feathers will grow back after their next molt which is usually sometime in the late spring to early fall. At that point, one can choose to re-clip or leave them be.
A few things to keep in mind:
- You only need to clip one wing. You can clip both, but clipping just the one is enough to throw them off balance and prevent flight.
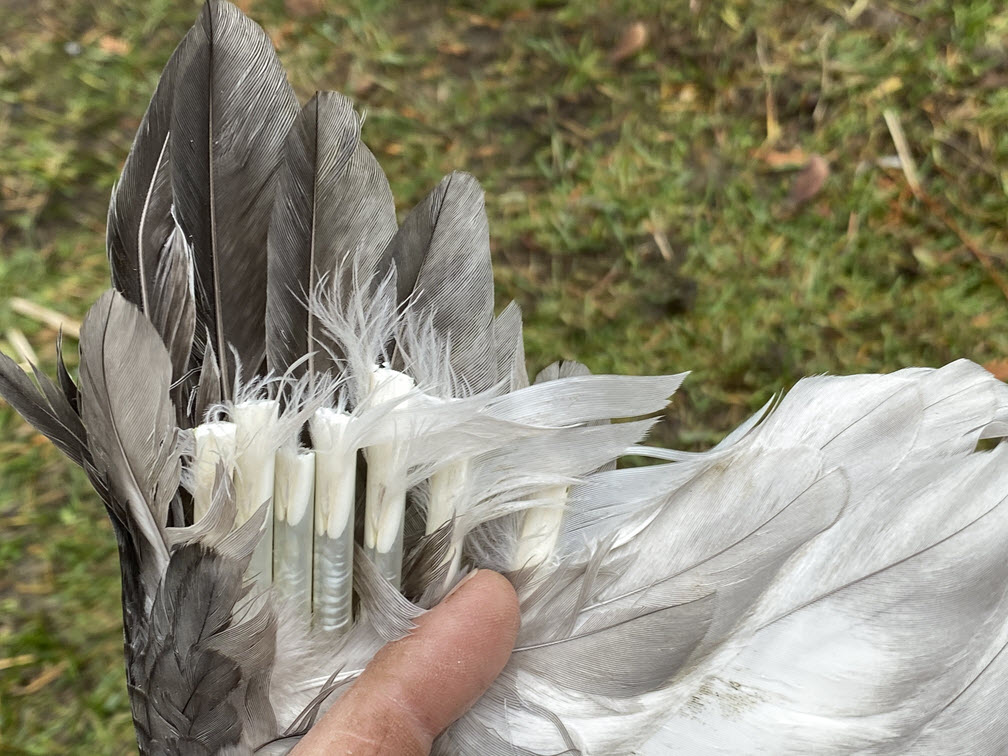
- There is no need to clip feathers on birds younger than about three to four months. This is because they don’t usually get their flight feathers until about four months of age and you don’t want to clip blood feathers. Blood feathers are new feathers that still have a blood supply in the feather shaft. You will also find these on newly molted birds. So please be careful and check prior to clipping.
NOTE: If you do accidentally clip a blood feather, don’t panic. It’s not the end of the world. Spray some wound care solution (such as Microcyn or Vetericyn, both found at your local feed store or online) on the clipped shaft and return them to the flock. Monitor that the other birds don’t pick at their wing and separate them if you notice others picking. - In the case of turkeys, adults can still jump 6 feet even with a clipped wing. You can clip to prevent flight, but keep in mind they can and will jump a fence (or onto your car) to gain access to another area so, in this instance, retraining them might be a better option than wing-clipping.
This process will go a lot more easily if you have someone to help. One person holds the bird and keeps their wing still while the other person cuts the feather.
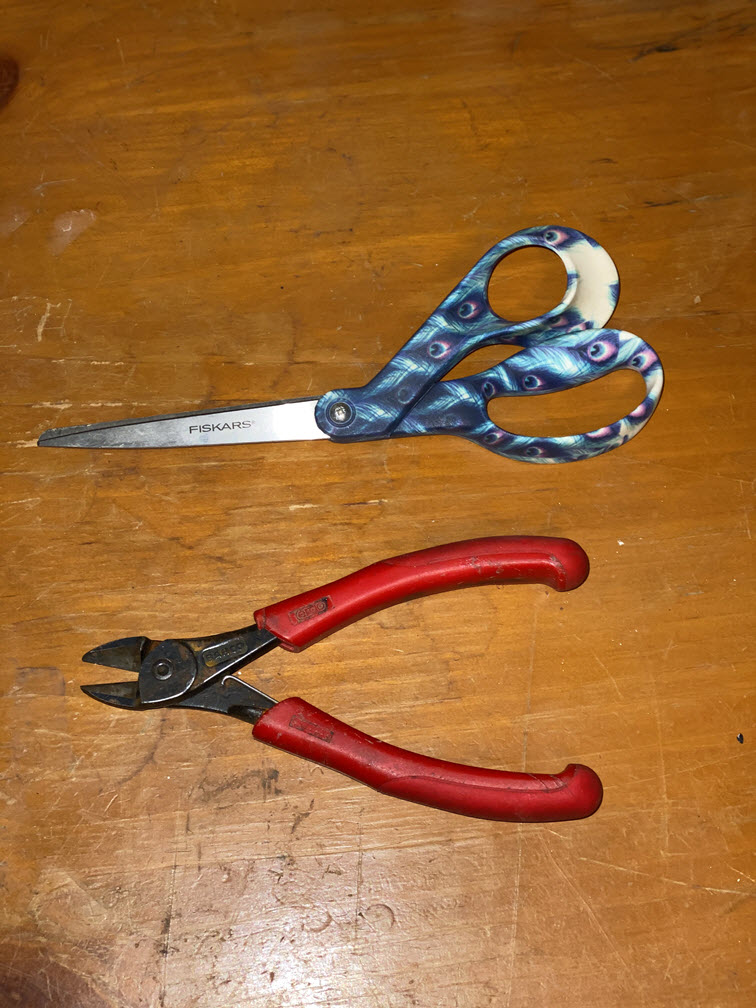 You’ll also need a pair of scissors, the sharper the better. I prefer to use Fiskars because they are incredibly sharp and cut through the thick shaft quite easily. Side or diagonal cutters work great as well. The last thing you want to be doing is trying to saw through a feather with a dull blade.
The only other thing that will make this process easier is a chair. I will tell you now that even the friendliest of birds get scared because they have no idea what’s going on. So a chair provides the person who is holding the bird a comfortable and stable spot with which to keep the bird calm.
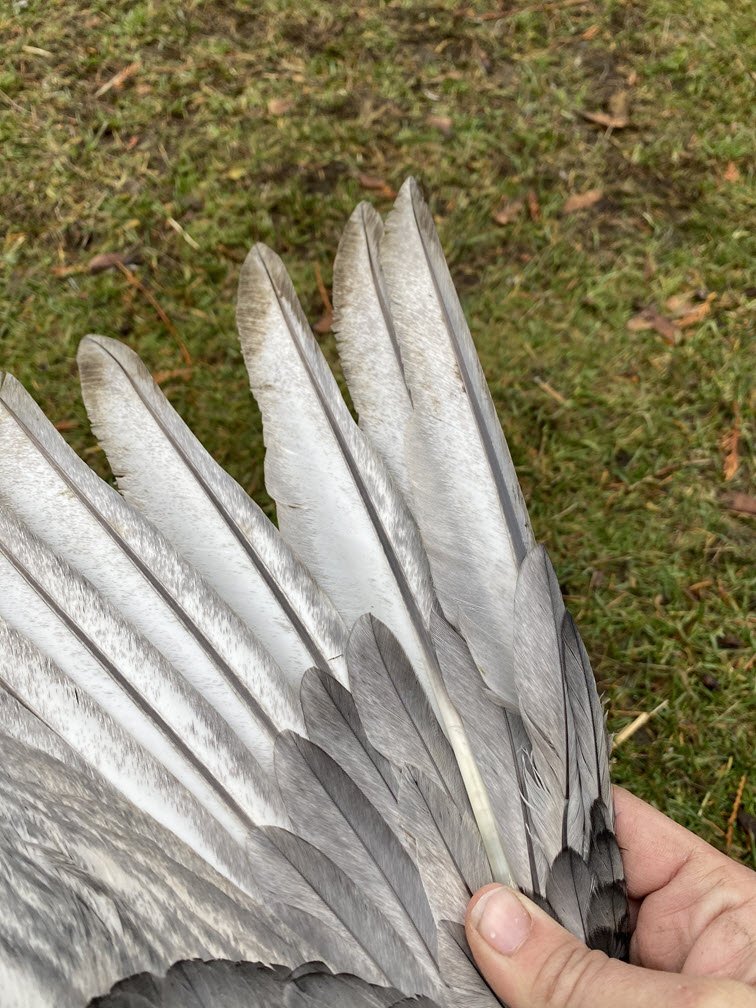
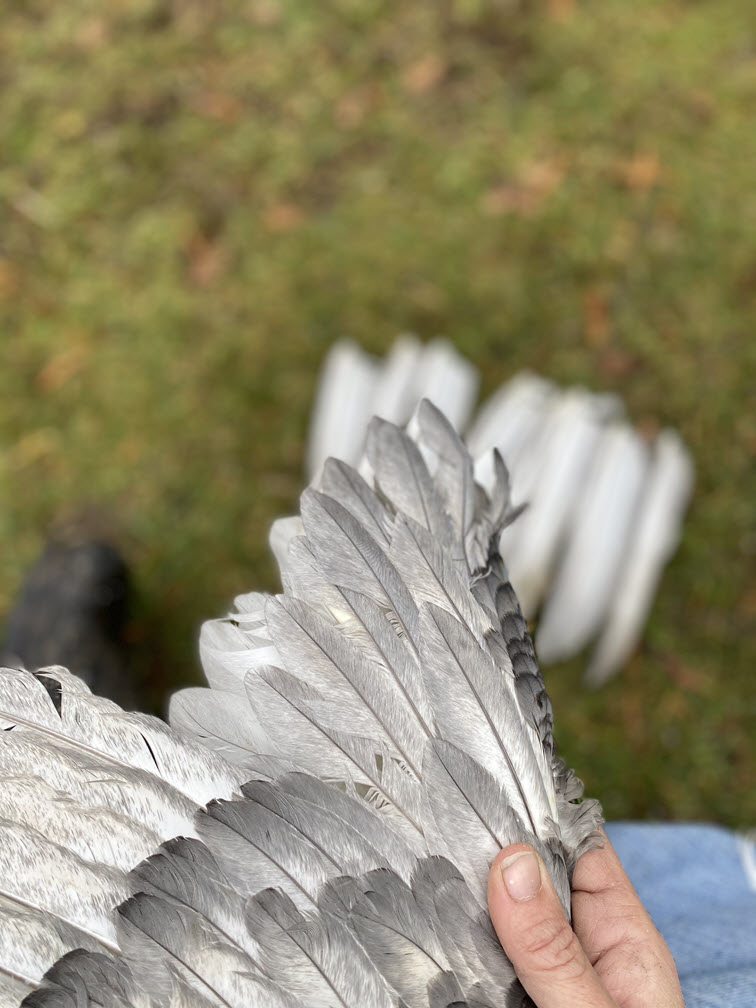
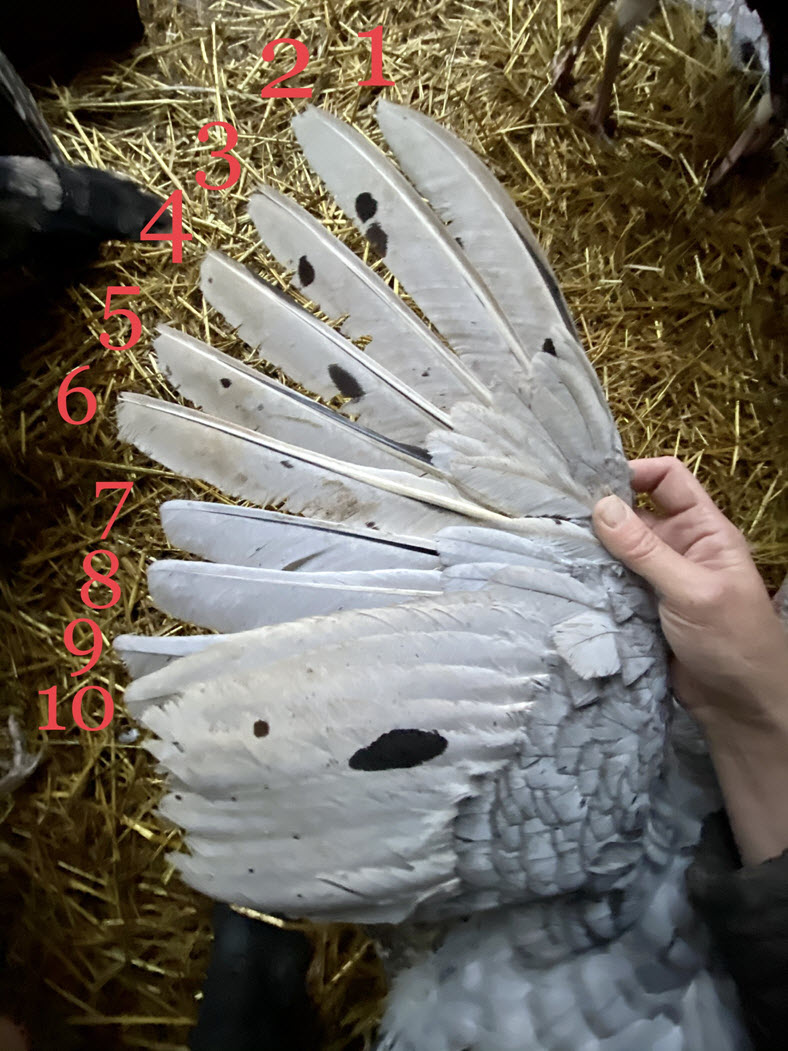
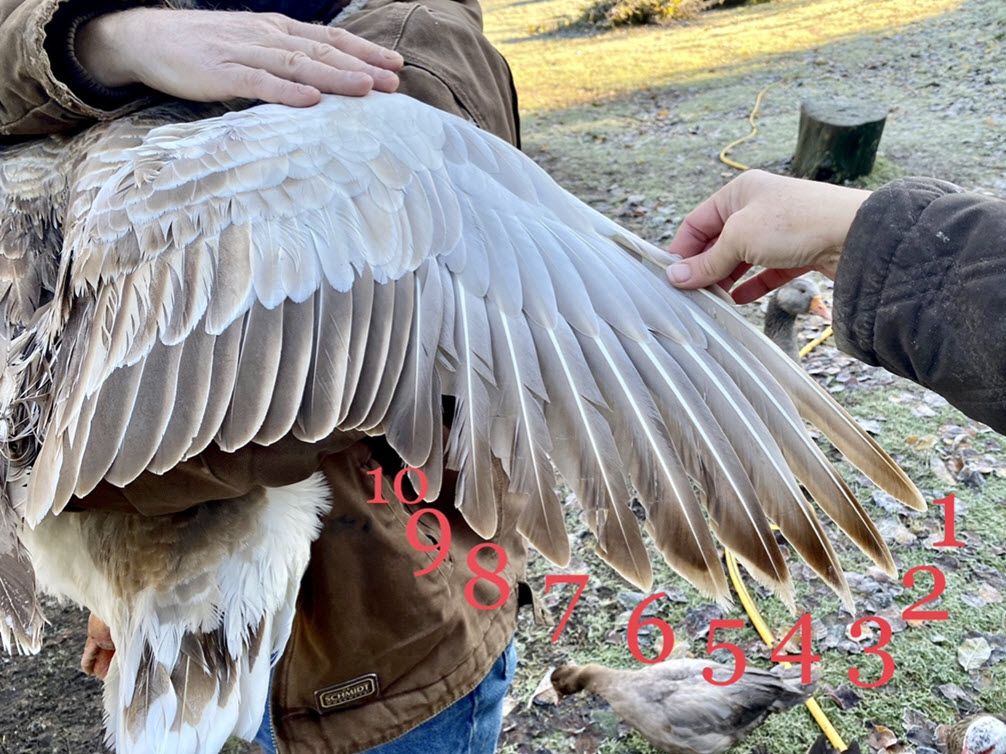
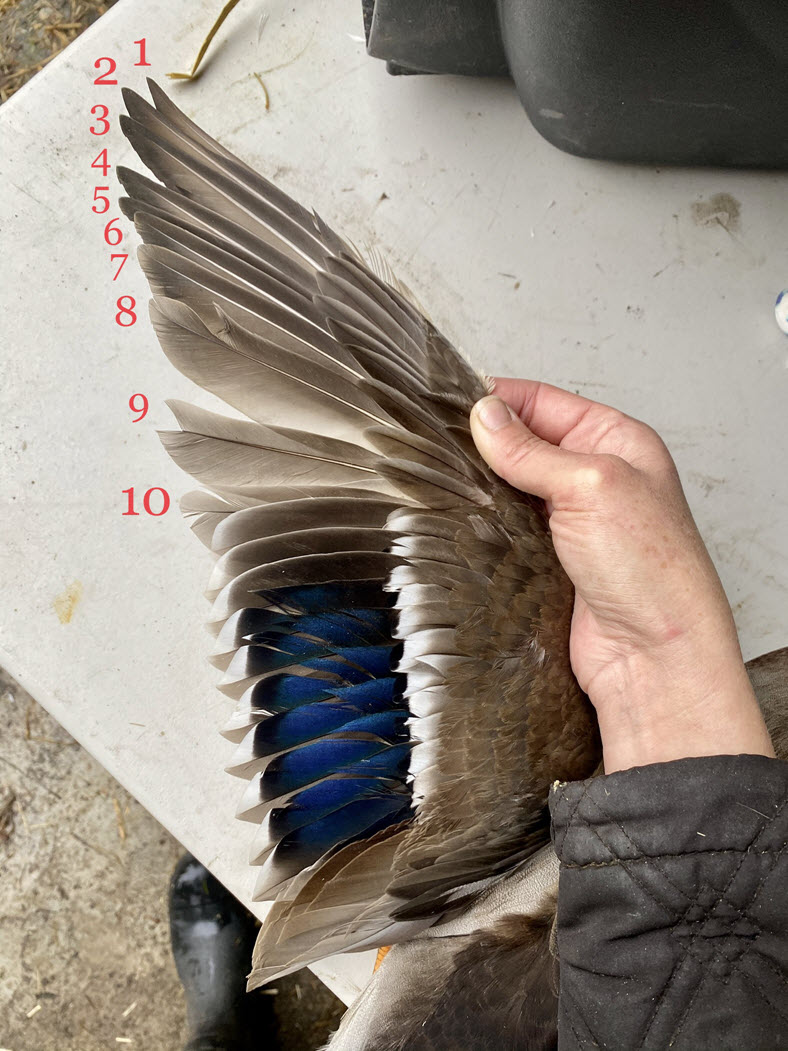
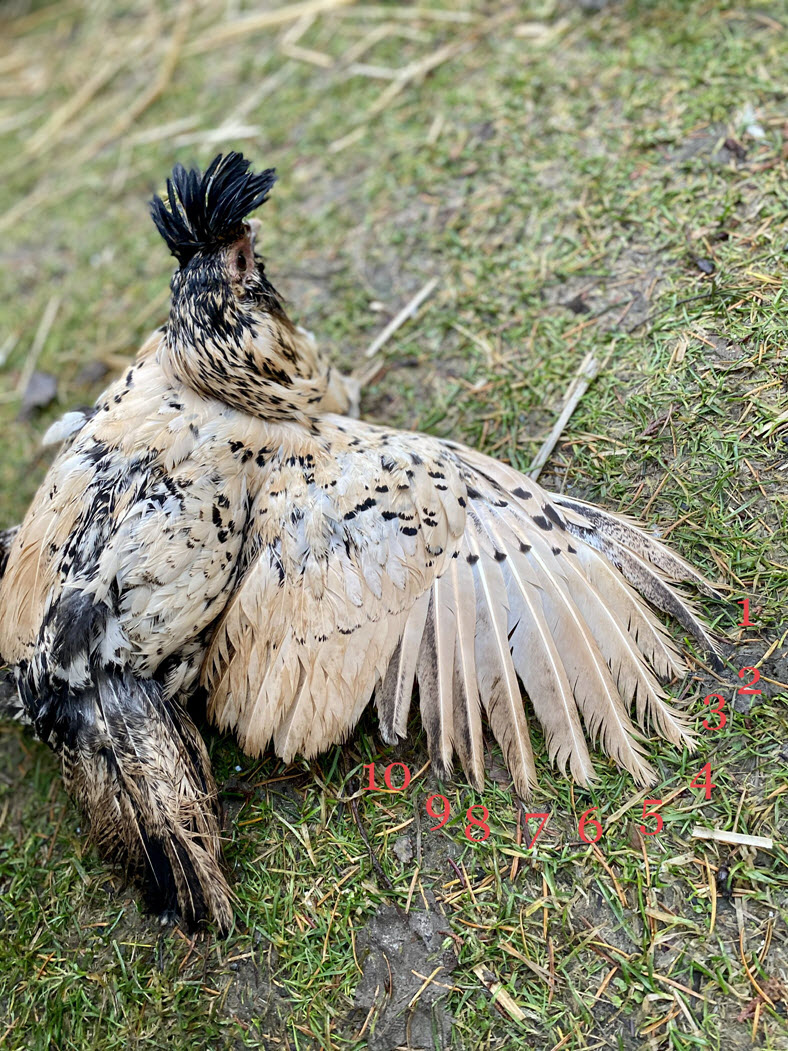
There are three main parts of the wing that you’ll need to know. They are the primary feathers, the secondary feathers, and the covert feathers.
 The longest feathers on the wing are the primary feathers. There are ten of these.
The second longest lay right next to the primaries and are called the secondary feathers. Together with the primary feathers, these are what’s known as remiges (REM-i-jeez) or more commonly referred to as the flight feathers. The secondary feathers do assist in flight, but are not crucial to the ability of flight by themselves. Basically, if you don’t clip the secondaries, but you do clip the primaries, the bird won’t fly.
The short feathers that lay over the top of the flight feathers like a shawl are the covert feathers. There are several different types of coverts, but for the purpose of this tutorial, we will lump them into one general category.
 This is the way I do it and you can tweak it as you see fit. I’m usually “the sitter” and my helper is “the clipper”. Once the bird has been acquired, I situate the bird in my lap and hold both its feet with one hand and spread the wing with the other. I definitely advise securing their feet. They have this annoying habit of lulling you into a false sense of security where you think they are relaxed, but they are just plotting and waiting to kick off and make their escape.
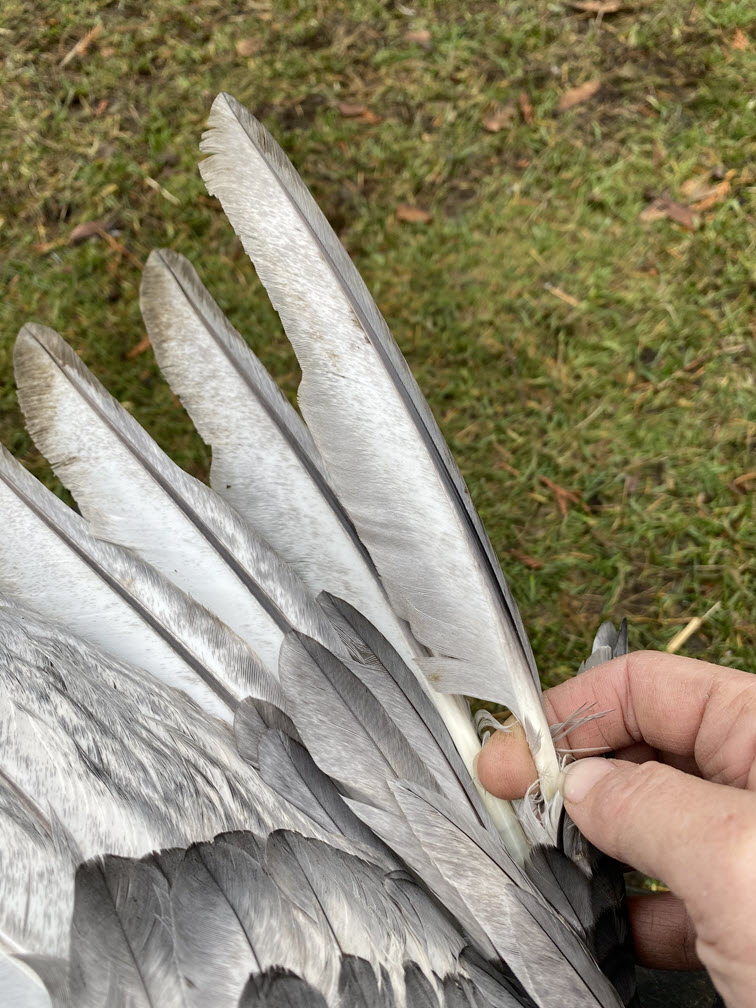
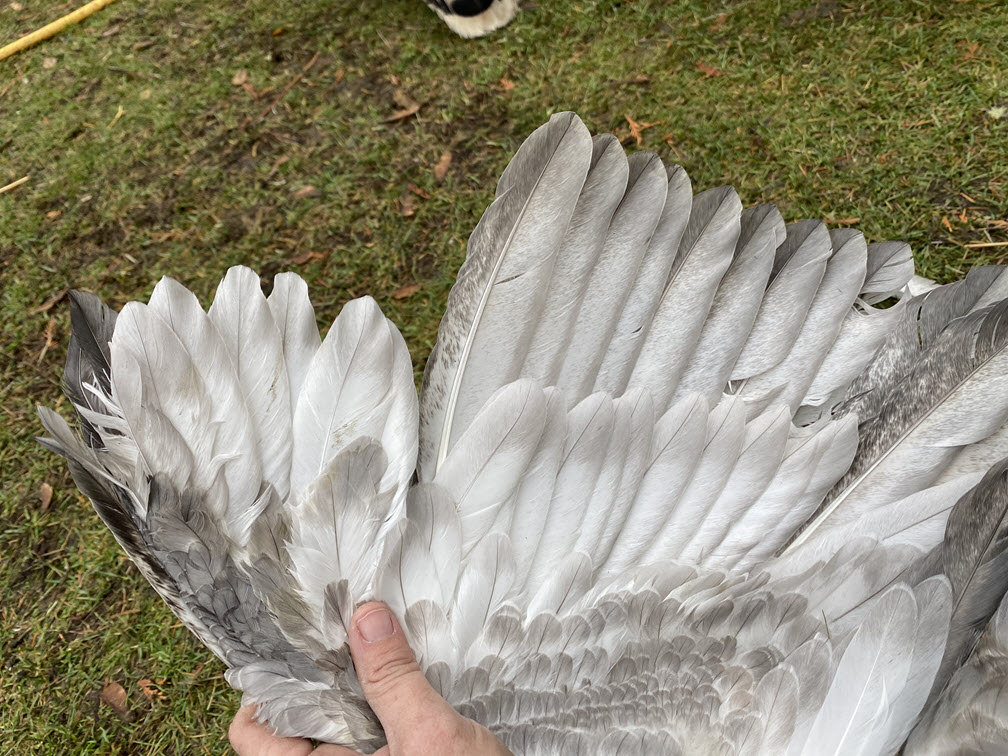
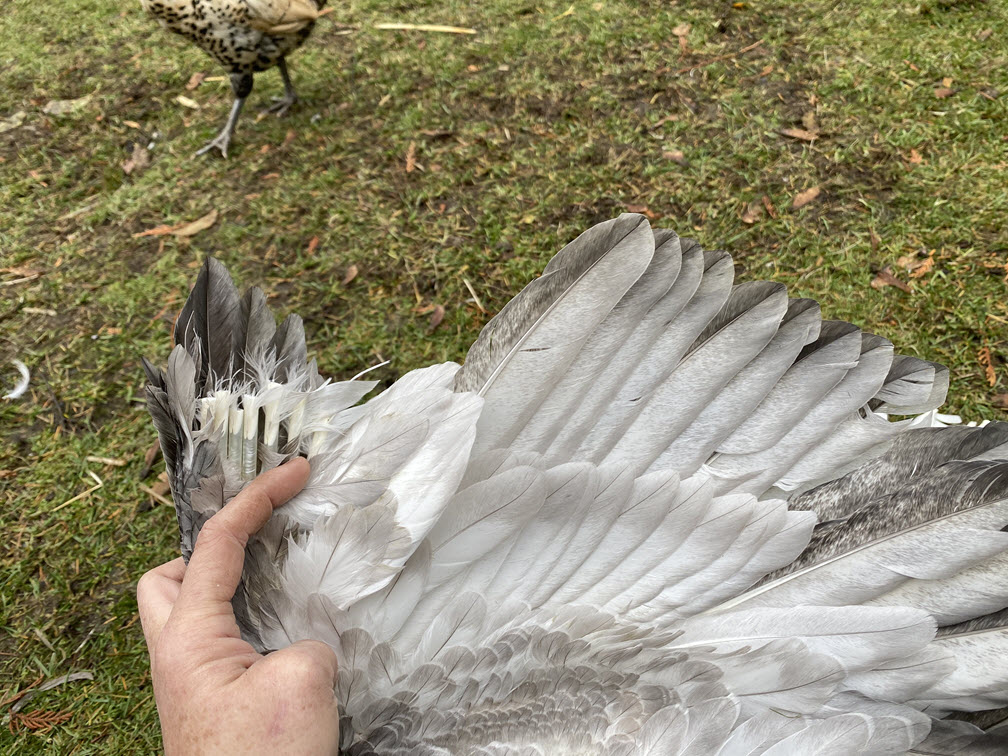
The person assisting will start on the outermost primary feather and carefully move the covert away from the primary and clip the quill of the primary. The quill is the hollow part of the feather shaft without any barbs on it. In some cases, you won’t be able to clip the quill and will have to clip the shaft which is the part of the feather with barbs on it. The reason why I choose to move the coverts is purely for aesthetic purposes. You’ll see why in a moment.
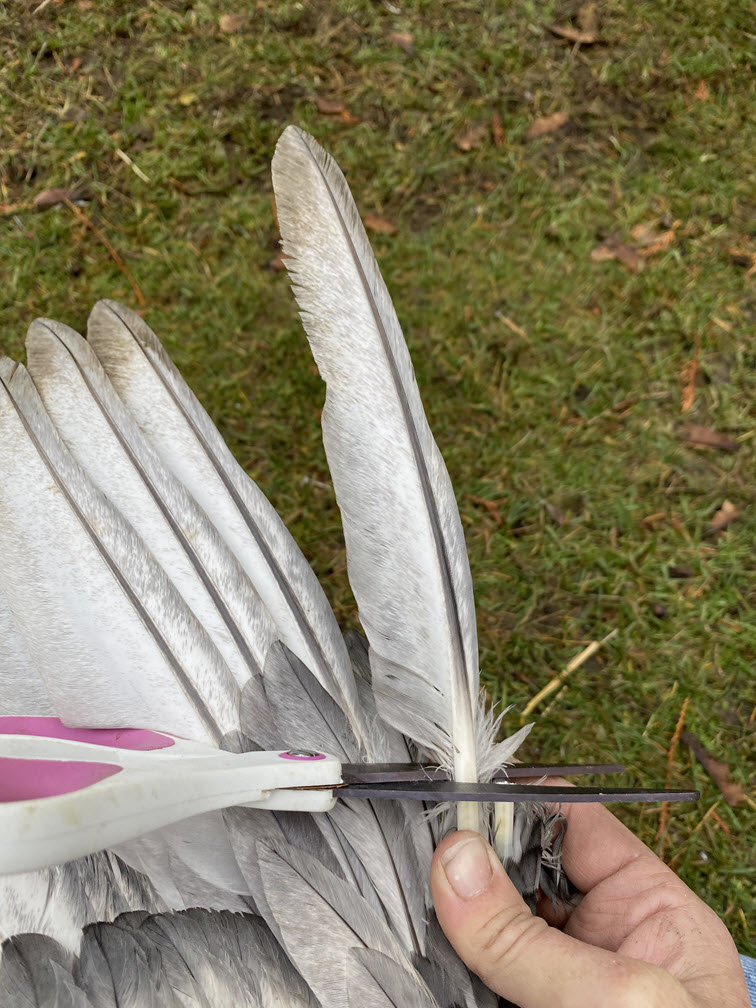
The process is repeated for the rest of the primary feathers, each time moving away the coverts and lining the next cut up to the length of the last cut. Depending on the thickness of the quill, you can cut a couple at a time to speed the process along, but again, tweak this technique as you feel comfortable. You only need to cut about seven or eight of the primaries.
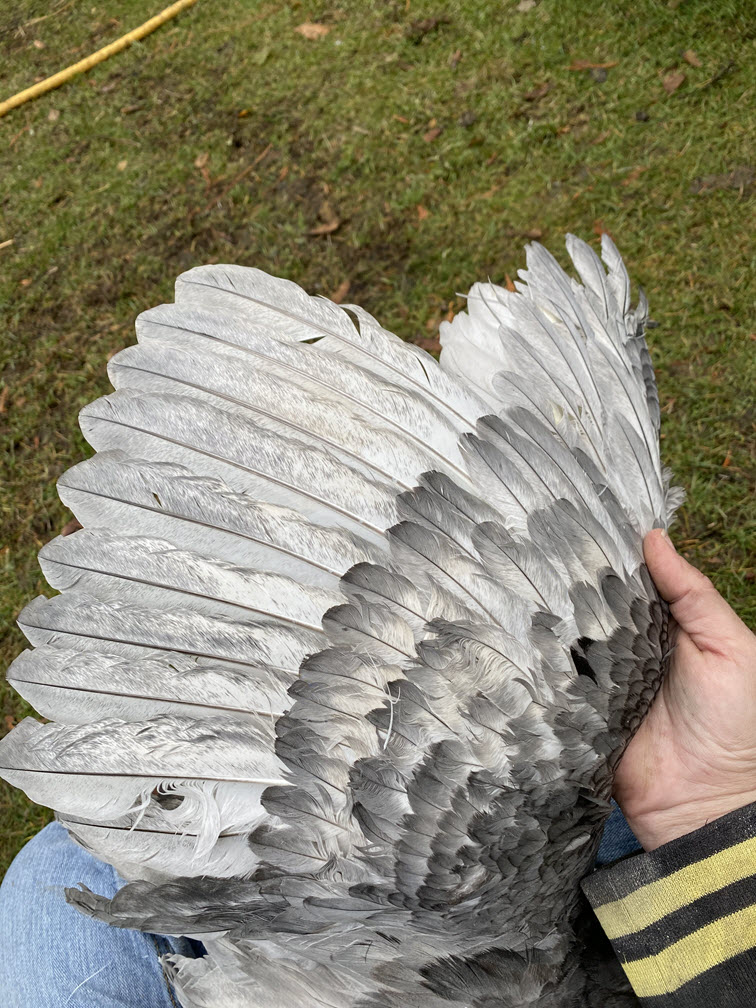
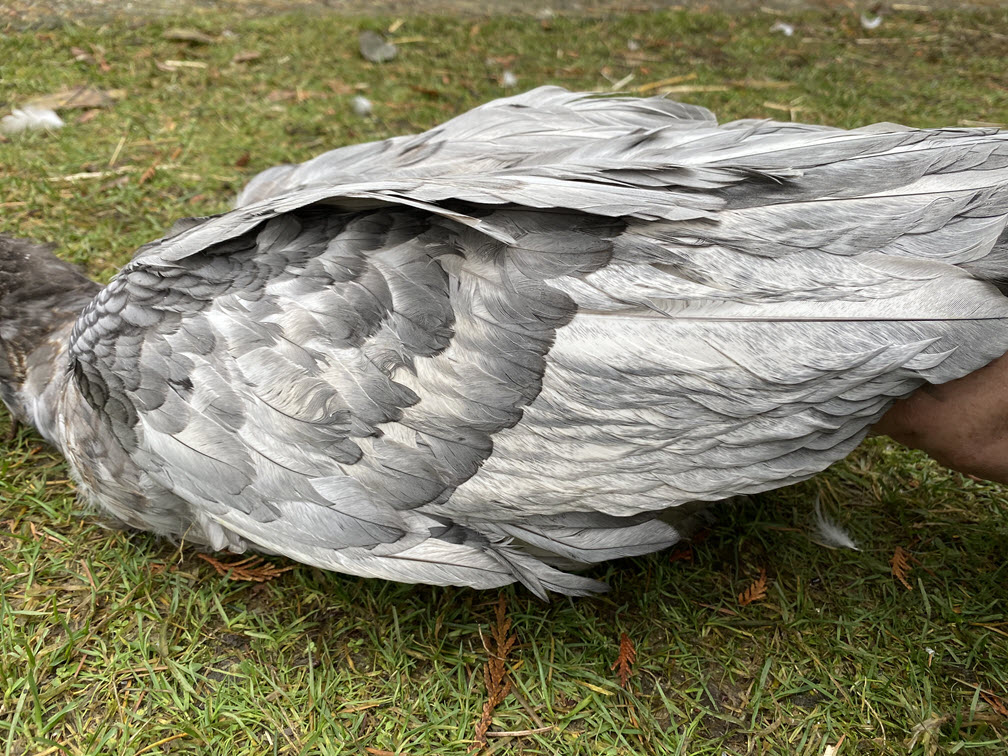
You can clip the secondaries using the same method as above if you’d like, but it’s not necessary. As long as you cut enough of the primary feathers, you have effectively grounded the bird. The other reason I don’t clip the secondary feathers is for aesthetic purposes. You will see in the accompanying photos that once the bird lays its wing back against its body, you can’t tell that their wing has been clipped. When a bird folds its wings, it’s the secondary feathers that are visible. The primary feathers tuck neatly underneath them.
That’s really all there is to it. You have a very wordy, but in-depth step-by-step of how to clip a birds wing. I hope it helps.
 As a side note, if you ever wonder how a bird is feeling, look at their face. You can tell a lot from their eyes and mouth. If they are scared, their eyes will be wide and they will pant. Because they are prey animals, they will be scared during this process. But this procedure is painless because feathers don’t have nerves. It’s a lot like clipping a finger nail. Still, I always feel it’s best to get it done as quickly as possible rather than spending an inordinate amount of time trying to soothe them beforehand. You’re never going to fully calm them.
Once the process is done, I usually have a short snuggle/bonding session before returning them to their flock. It’s also a good time to check their feet for abrasions and give them an overall health inspection.